The Users page is where you manage everyone who has access to your BriefSpec workspace. From here you can invite new team members, assign roles, manage departments, and control who can access which projects. This guide walks through each numbered section.
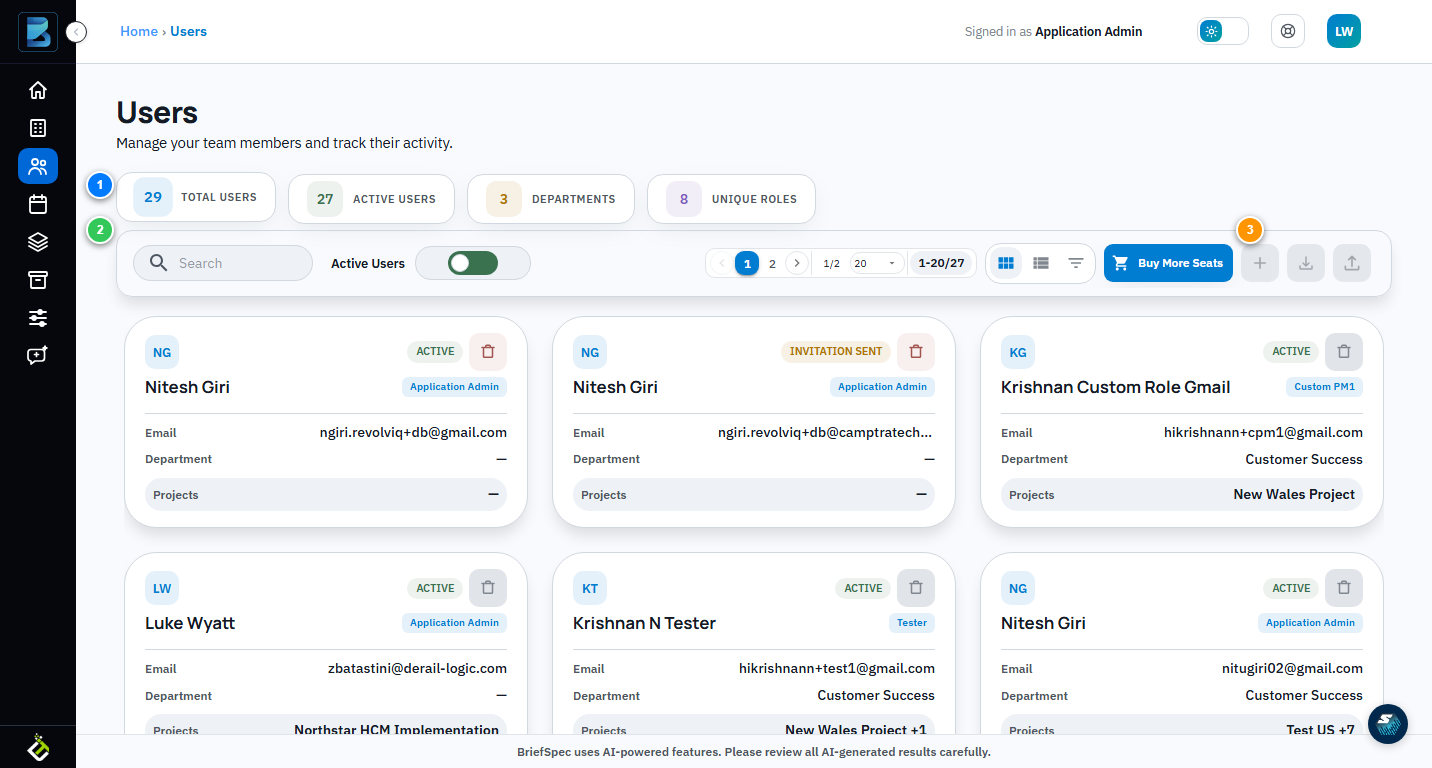
① Summary Statistics
Four metric cards at the top give you an instant overview: Total Users, Active Users, Departments, and Unique Roles. These update automatically as you add and manage users.
② Search, Filter & View Controls
Use the Search bar to find users by name or email. Toggle between Active and all users with the status switch. Switch between Grid View and List View. Use Advance Filter for granular queries. Click Buy More Seats to increase your user license count.
③ Add User
Click the + button to invite a new team member. You’ll enter their name, email, role, and department. They receive an invitation email with a link to set up their account. Roles determine what they can see and do — from Application Admin (full access) to Tester (execution-only).
④ User Cards
Each card shows a user’s initials, name, role, email, department, and assigned projects. Click any card to edit their details, change their role, or manage project assignments. The delete button removes a user — available only if they’re not currently assigned to any active project.