Every project in BriefSpec starts with a few key decisions — what you’re building, who it’s for, and how it’ll be tracked. This guide walks you through creating your first project from start to finish.

Step 1: Navigate to the Projects Page

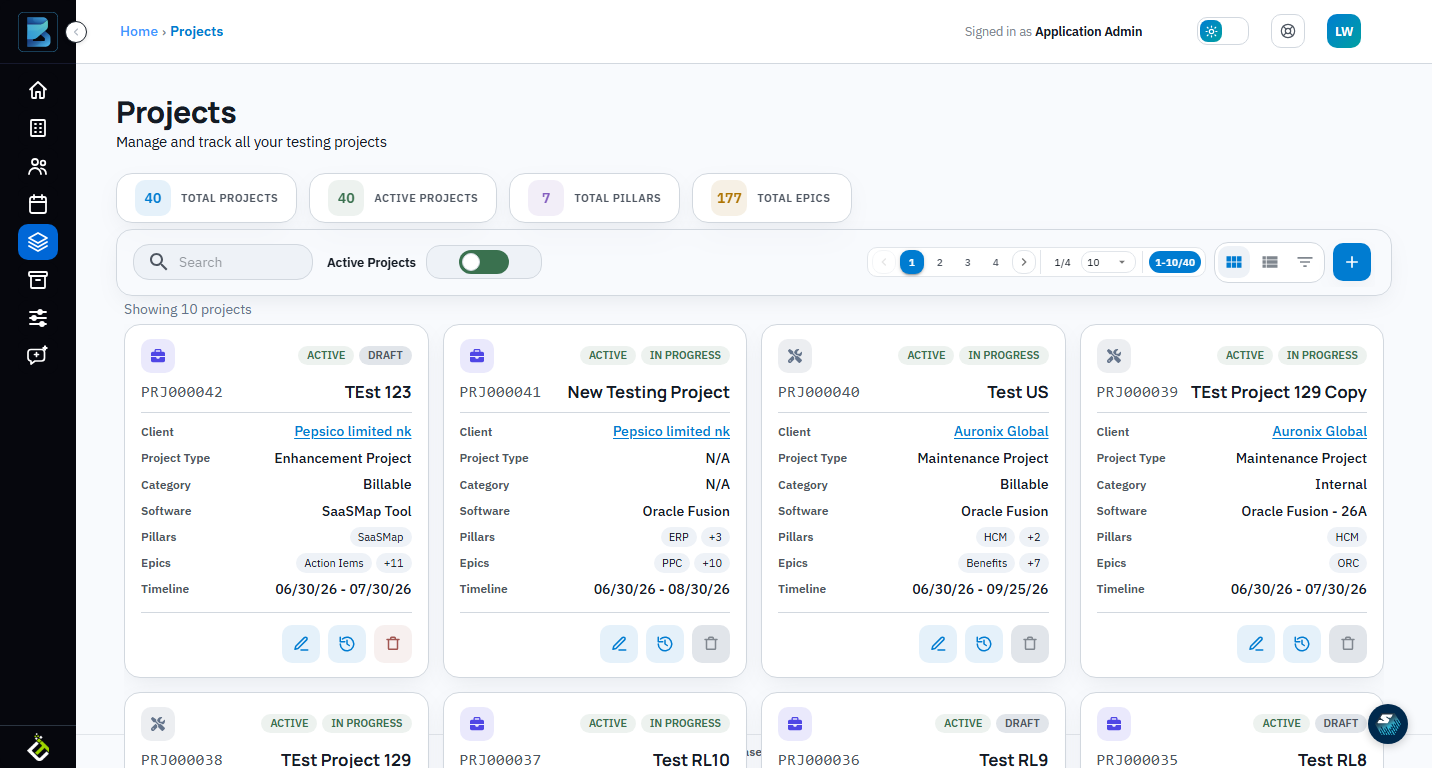
From the Home dashboard, click Projects in the left sidebar. You’ll see a grid of all projects in your tenant, each card showing the project name, client, type, status, and timeline.

BriefSpec Projects page with Add project button and metric cards highlighted
The Projects page. Click the blue + button (①) to start a new project. The metric cards (②) show portfolio stats: Total Projects, Active Projects, Pillars, and Epics.

Use the search bar and Active Projects toggle to filter your view. To create a new project, click the blue + button in the top-right corner.

Step 2: Fill In Project Details

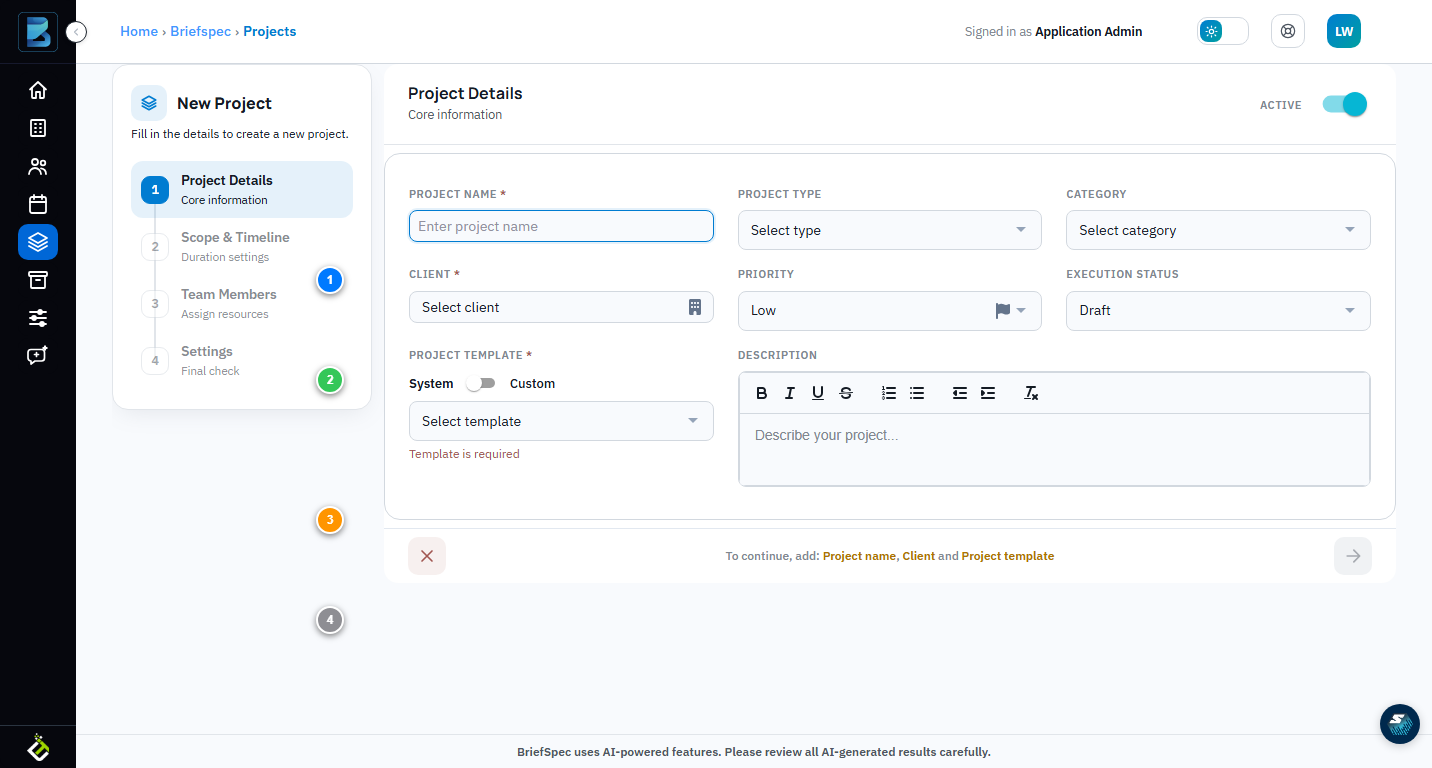
Clicking + opens the New Project wizard. Step 1 is Project Details. The three required fields — Project Name, Client, and Project Template — are marked with a red asterisk (*).

BriefSpec New Project form with all fields
The New Project form (Step 1 of 4). Fill in Project Name, Client, and Project Template to enable the Next button. The helper message at the bottom tells you exactly what’s still needed.

Field Reference

  • Project Name * — Give your project a clear, descriptive name. This appears everywhere: dashboards, reports, the RTM matrix.
  • Project Type — Implementation, Enhancement, Migration, Support, POC, and more.
  • Category — Billable, Internal, Maintenance, or Research.
  • Client * — The client organization. Add clients from the Clients page if none exist yet.
  • Priority — Low, Medium, or High.
  • Execution Status — Starts as Draft. Tracks progression through In Progress, On Hold, Completed, or Archived.
  • Project Template * — The most important choice. Templates pre-load your project with the right module structure (AMS, Testing, RTM, Documentation, Managed Services). Switch to Custom to build your own. This determines which tabs appear in your project workspace.
  • Description — Rich text field for goals, scope notes, or team context.

The Next button stays disabled until all three required fields are complete. The helper message updates as you go.

Step 3: Scope, Team & Settings

Once your required fields are filled, the Next button activates. Click it to continue:

  • Step 2 — Scope & Timeline: Set start and target dates, define the software scope.
  • Step 3 — Team Members: Assign team members. You can skip this and add people later.
  • Step 4 — Settings: Configure notifications, access controls, and integrations. Also skippable.

After Your Project Is Live

Click into your new project from the Projects grid. The project workspace opens with everything organized into logical sections:

BriefSpec project workspace dashboard
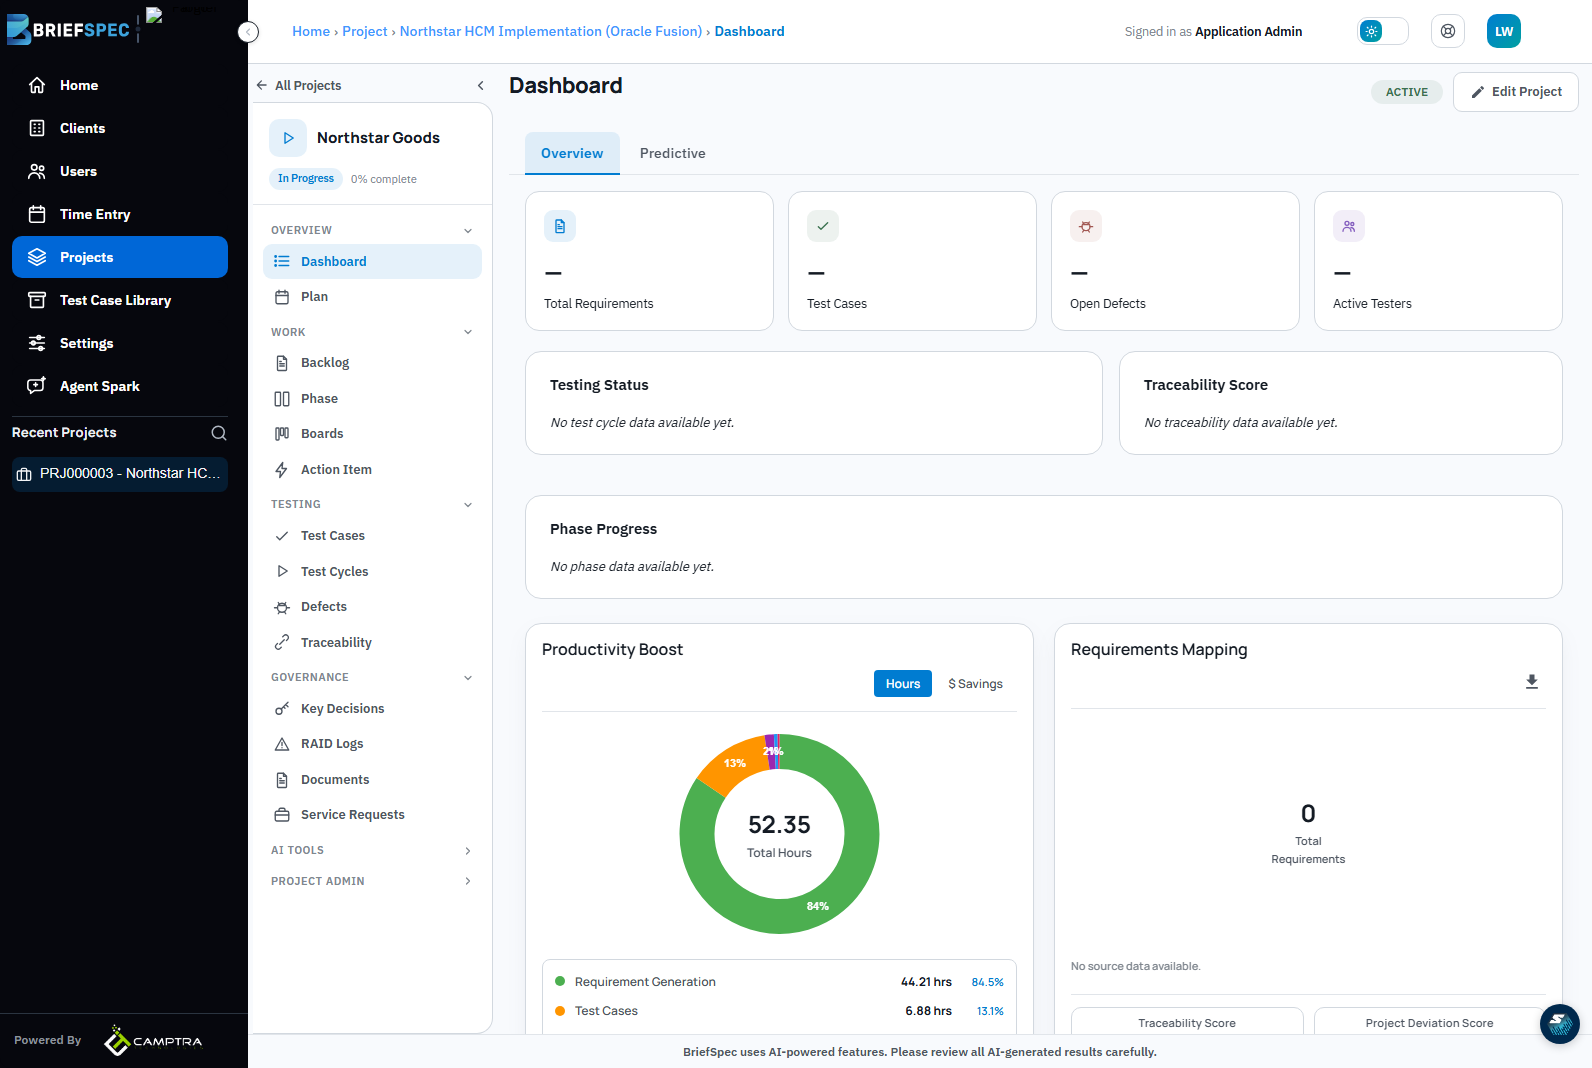
The project workspace. Summary cards give you an instant pulse on requirements, test cases, defects, and active testers. The left sidebar organizes Backlog, Testing, Governance, and AI Tools.
  • Overview — Dashboard with summary cards and visual charts.
  • Work — Backlog, Phases, Boards, Action Items.
  • Testing — Test Cases, Test Cycles, Defects, Traceability.
  • Governance — Key Decisions, RAID Logs, Documents, Service Requests.
  • AI Tools — AI Agent for test generation and document analysis.

Draft projects are fully flexible — rename them, swap templates, reassign clients, or adjust dates anytime.