Your Account & Profile settings control who you are inside BriefSpec — your name, role, contact information, and professional details — and where your tenant’s global configuration lives. This guide covers both: the Settings page that organizes every account-level control, and the My Profile modal that holds your personal details. Understanding this area matters because it’s where your identity, your team’s access, and your billing all converge.
Prerequisites
You can always view your own profile, but managing the broader Settings area depends on your role:
- To view your profile: no special privilege needed — any signed-in user can open My Profile.
- To change account-level settings (plan, AI keys, project templates): you need Application Admin or an equivalent role with the relevant privilege. If a card appears but its contents are read-only, your role lacks the edit privilege.
- A tenant: Settings are tenant-scoped. If you belong to multiple tenants (e.g. as a consultant across several clients), each tenant has its own Settings page, and your profile may differ slightly between them.
Where Account Settings Fit
BriefSpec separates two layers of “settings” that are easy to conflate:
- Account-level settings (this page) govern the whole tenant — your plan, AI provider keys, project templates, and default behaviors. They apply to every project you run.
- Project-level settings govern a single engagement — its phases, boards, custom fields, and members. They apply only to that one project.
The distinction is practical: if you want to change how much you pay or how AI is configured, you’re in account settings. If you want to change how one client’s project behaves, you’re in that project’s settings. This guide covers the account layer.
The Settings Overview
Open Settings from the sidebar (the sliders icon). You’ll land on a grid of cards — each one is an entry point to a distinct area:
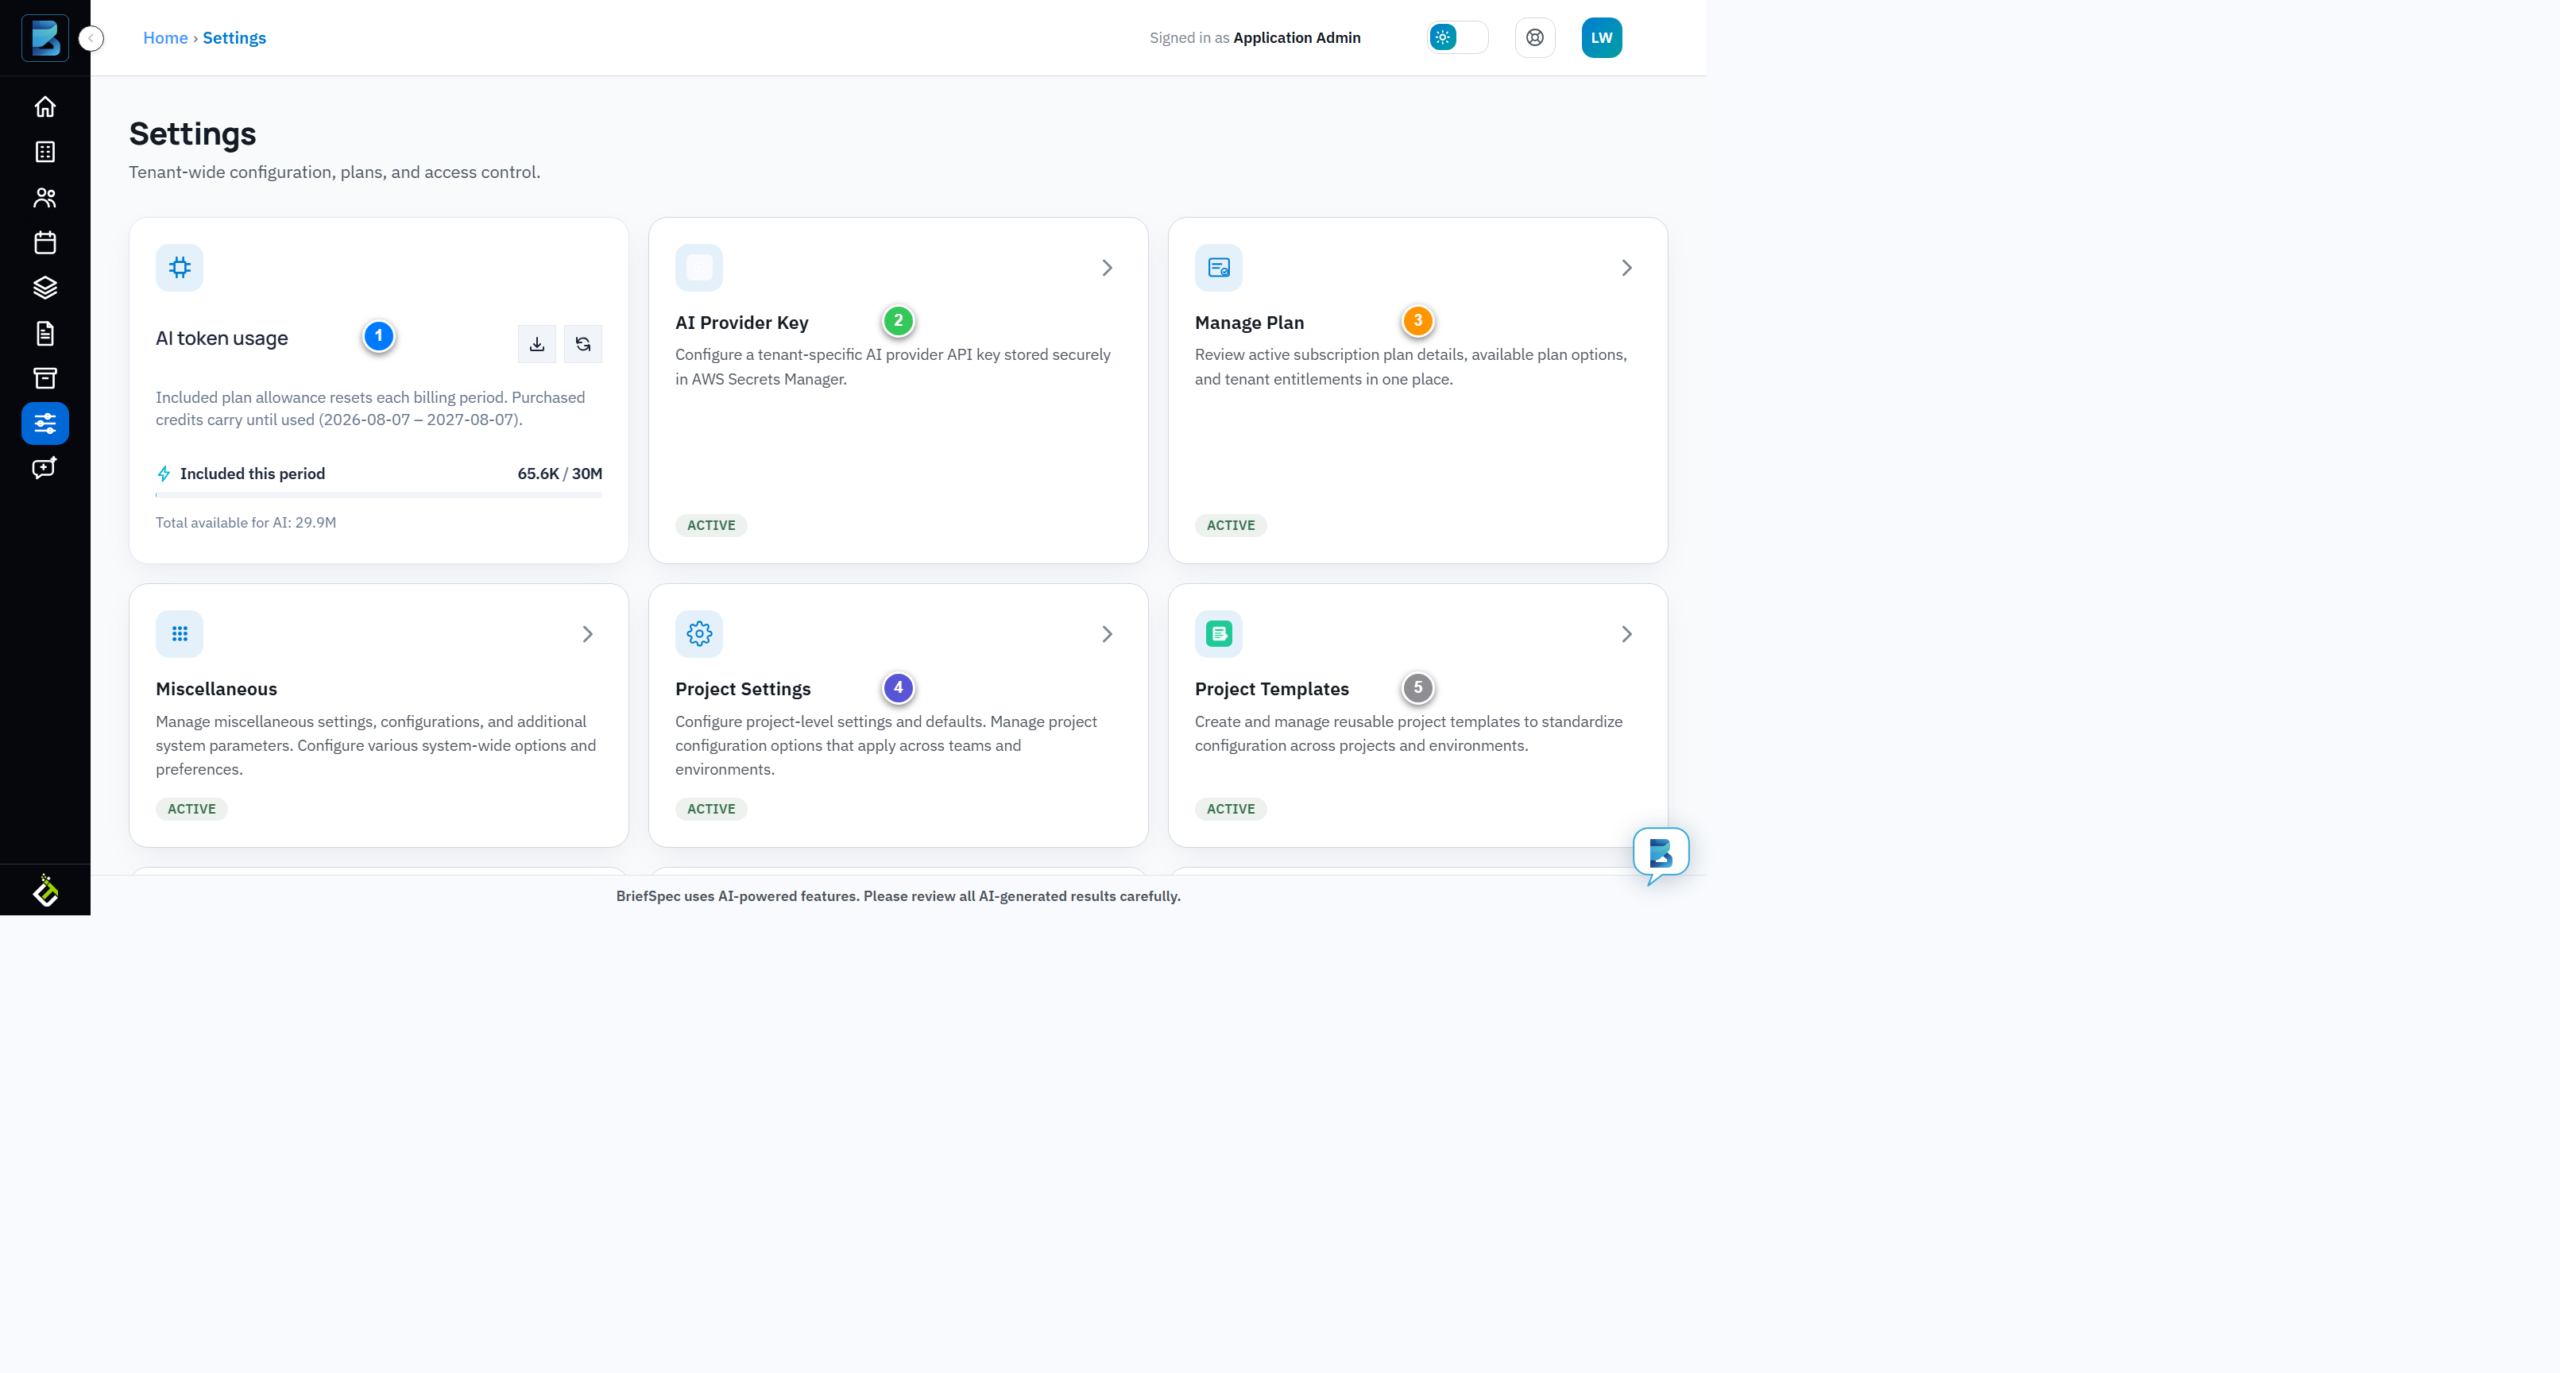
- AI token usage (1) — a live meter of your AI token consumption against the plan allowance. The download and refresh icons let you export usage or re-sync the numbers. This is the same allowance shown on the Manage Plan page, surfaced here for quick visibility.
- AI Provider Key (2) — where a tenant can supply its own AI provider credentials (stored in AWS Secrets Manager) instead of using BriefSpec’s default. This is for organizations that need their own model routing or data-residency controls.
- Manage Plan (3) — your subscription, plan comparison, utilization, and add-ons. This is the billing hub and is covered in depth in its own guide (see What’s Next).
- Project Settings (4) — project-level defaults and team-wide options that new projects inherit.
- Project Templates (5) — reusable configurations (phases, boards, custom fields) you can apply to new projects so you don’t rebuild structure each time.
- Identity header (1) — your avatar, display name, role (e.g. Application Admin), and account status. The pencil icon lets you change your profile photo; the edit icon changes your name. Your role is assigned by an administrator and isn’t editable from here.
- Contact Info (2) — your email address (used for sign-in and notifications) and phone number. Email is set at account creation; phone can be added or edited. If a field shows Not provided, it simply hasn’t been filled in yet.
- Additional Info (3) — your LinkedIn profile link and resume upload. These are optional but useful in consulting contexts: a complete profile with LinkedIn and a resume makes it easier for project leads to match you to engagements.
- Manage your plan & subscription to change tiers, check utilization, and buy add-ons.
- Understand roles & privileges to see how your role determines what you can edit in Settings.
- Create your first project to apply your tenant’s templates and defaults.
Reading the badges: a green ACTIVE badge on a card means that feature is configured and enabled for your tenant. A card without it (or with a different label) is available but not yet set up. Treat the badges as a quick health check of your tenant’s configuration.
Viewing & Editing Your Profile
Your personal profile lives in the My Profile modal, opened from the account menu (your avatar, top-right). It’s the source of truth for how your name and details appear across the platform:
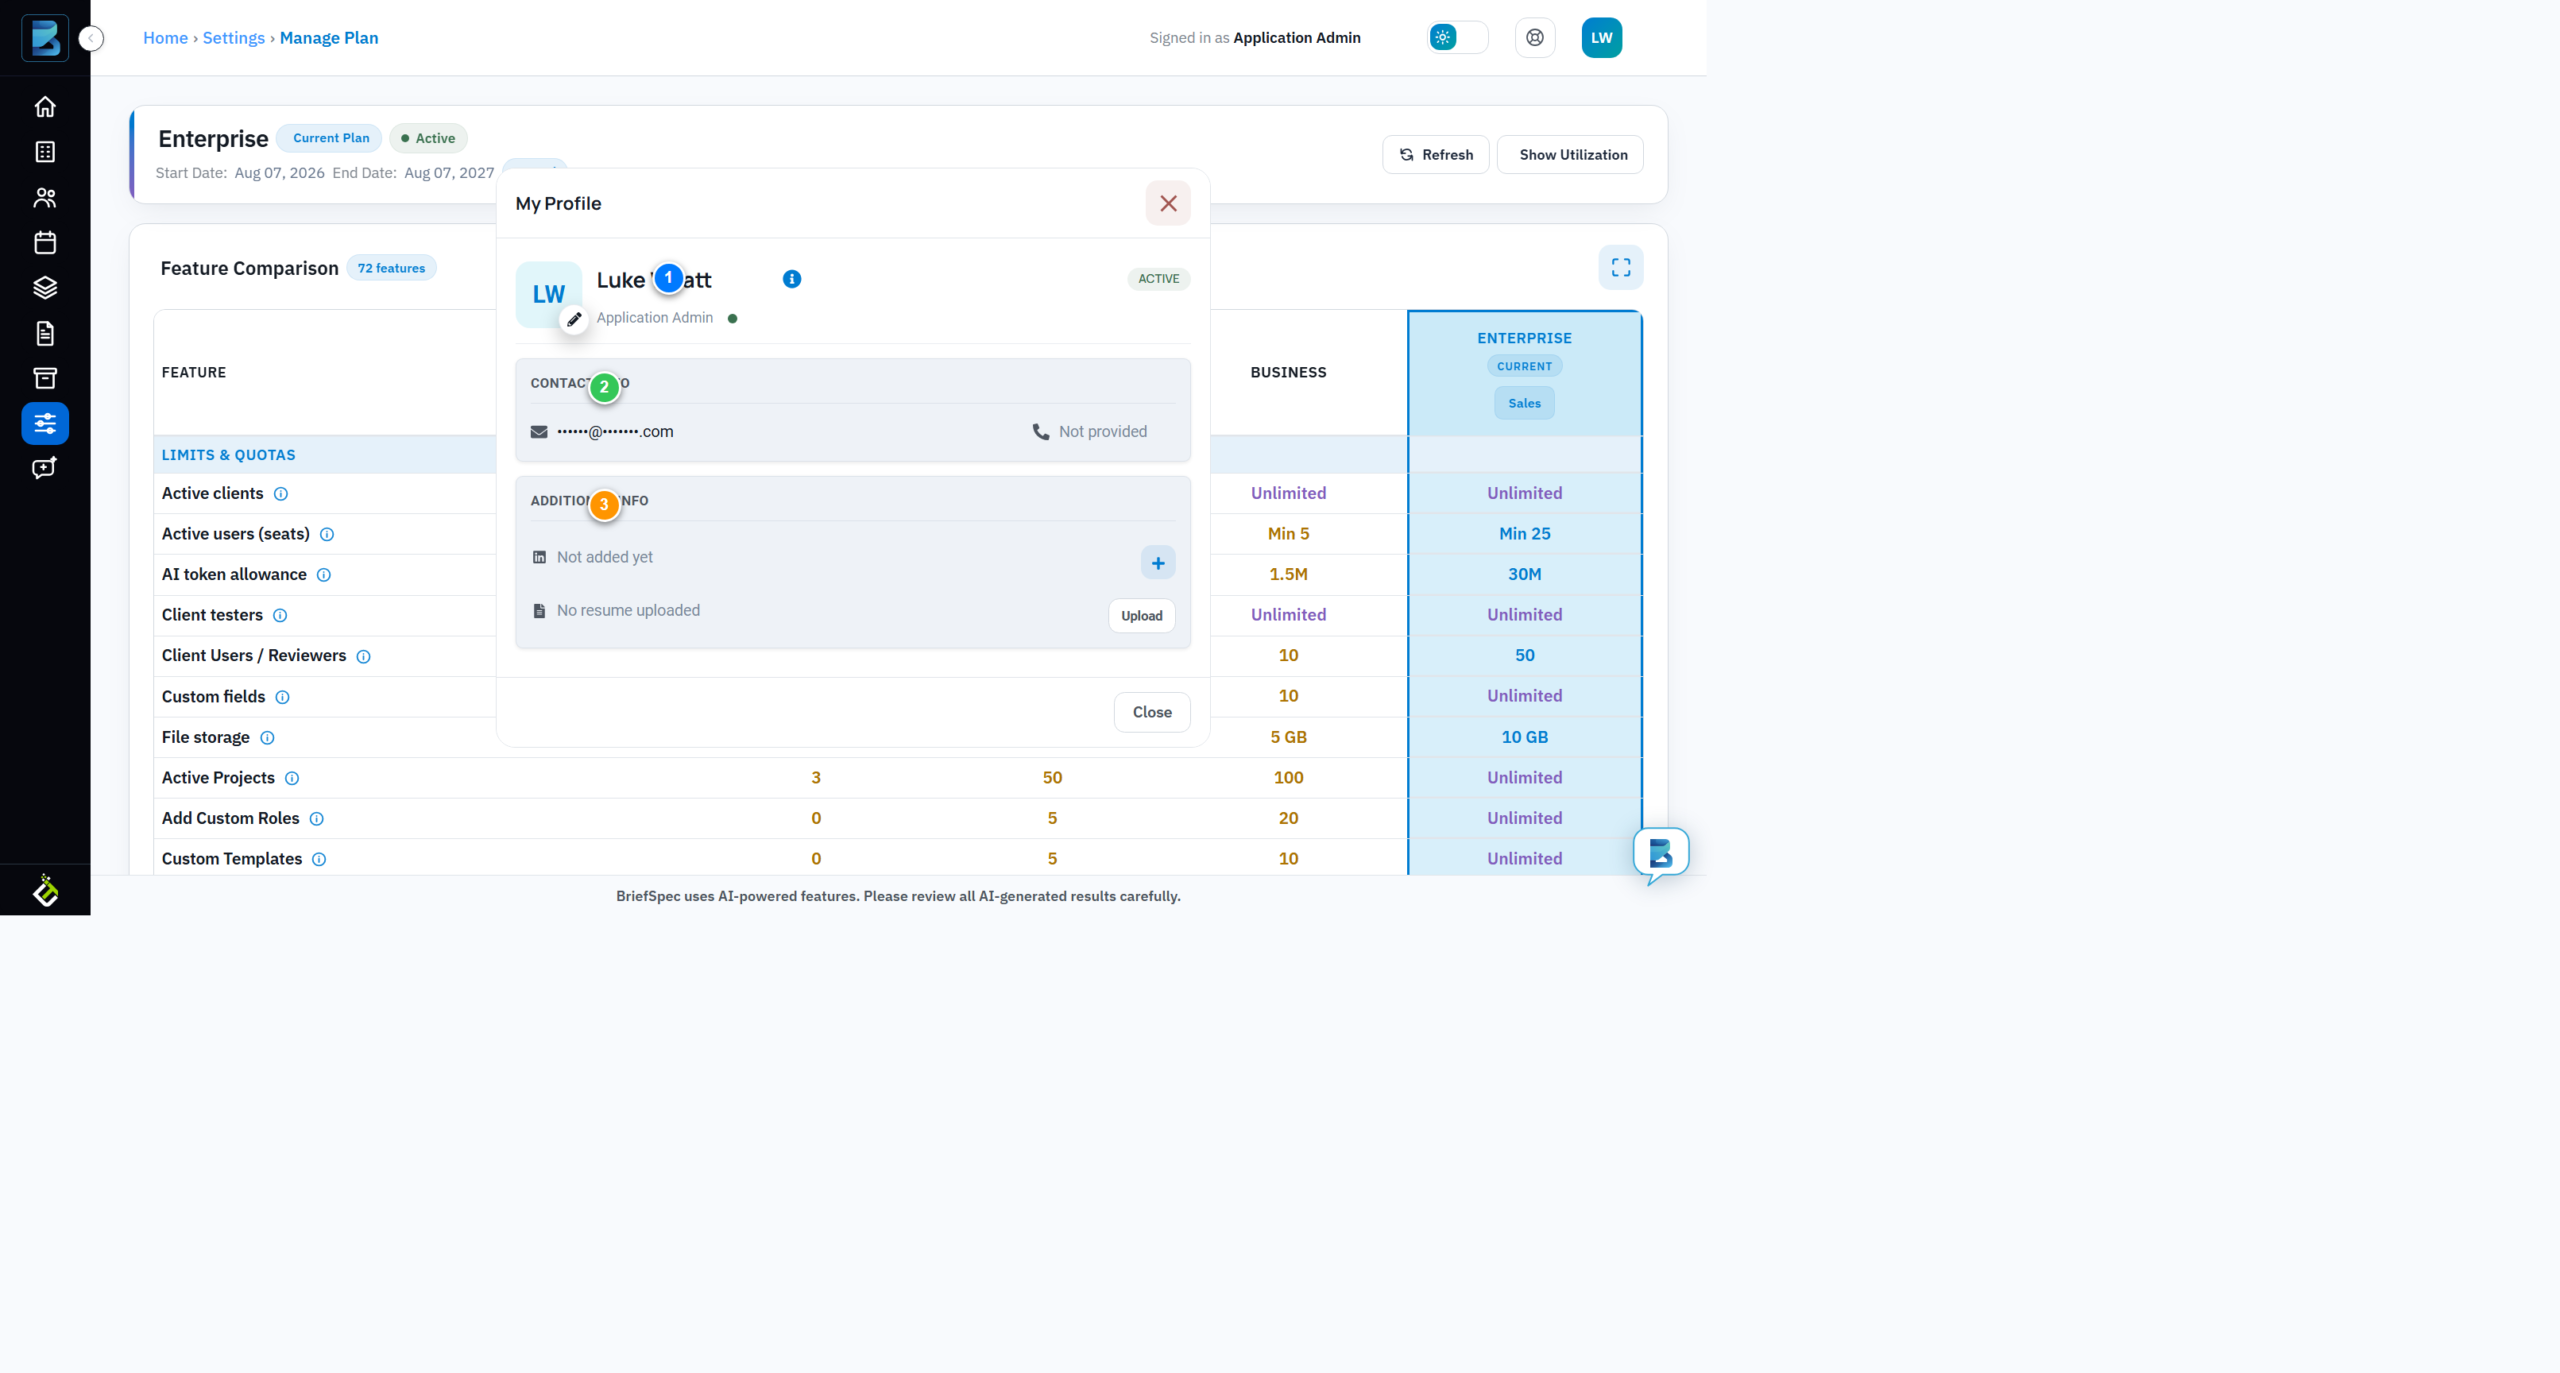
Why keep your profile current: your name and role are what other team members and client reviewers see on assignments, comments, and test results. A stale name or missing contact info creates confusion during execution — especially when multiple consultants are active on the same phase. Update your profile at the start of a new engagement, not halfway through a test cycle.